TFX Trainer 컴포넌트
TFX의 Trainer 컴포넌트는 파이프라인의 학습 단계를 처리하는 컴포넌트이다. 이 컴포넌트는 새로운 데이터를 변환하고 예측하는 모델을 생성한다. 여기서 중요한 점은, 이 모델이 Transform 단계를 포함한다는 것이다. 데이터 전처리에 의해 만들어진 변환 데이터는 항상 학습될 모델이 기대하는 데이터와 일치하므로 잠재적인 오류를 배제할 수 있는 것이 최대 장점이다.
예시 Trainer 컴포넌트에는 다음과 같은 입력이 필요하다.
- 데이터 검증 단계에서 생성된 데이터 스키마
- 변환 데이터 및 전처리 그래프
- 학습 하이퍼 파라미터
- run_fn() 함수가 포함된 모듈 파일
run_fn() 함수
Trainer 컴포넌트는 모듈 파일에서 run_fn() 함수를 찾아 학습 프로세스를 시작한다. 따라서 Trainer 컴포넌트는 모듈 파일에 접근할 수 있어야 하므로, 대화형 콘텍스트에서 컴포넌트를 실행할 때는 모듈 파일의 절대 경로를 정의해 컴포넌트에 전달해주어야 한다.
run_fn() 함수는 학습 단계의 일반적인 진입점으로, 다음과 같은 단계를 수행한다.
- 학습 및 검증 데이터 로드
- 모델 컴파일 및 학습
- 모델 내보내기
학습 및 검증 데이터 로드
다음 코드는 run_fn()의 일부로, 학습 및 평가 데이터를 로드한다.
# fn_args는 run_fn()의 인자
tf_transform_output = tft.TFTransformOutput(fn_args.transform_output)
train_dataset = input_fn(fn_args.train_files, tf_transform_output)
eval_dataset = input_fn(fn_args.eval_files, tf_transform_output)
첫 번째 줄에서, run_fn() 함수는 인자 fn_args가 Transform 컴포넌트를 거쳐 만들어진 변환 그래프, 예제 데이터셋, 학습 매개변수를 포함한 일련의 output 인수를 tf_transform_output으로 수신한다. 이는 다음 줄에서 학습 및 검증 데이터를 로딩하기 위해 사용되며, 이때 사용되는 input_fn()은 다음과 같다.
# helper function
def _gzip_reader_fn(filenames):
  return tf.data.TFRecordDataset(filenames, compression_type='GZIP')

# input_fn()
def input_fn(file_pattern, tf_transform_output, batch_size=32):
  transformed_feature_spec = (
      tf_transform_output.transformed_feature_spec().copy()
  )

  dataset = tf.data.experimental.make_batched_features_dataset(
      file_pattern=file_pattern,
      batch_size=batch_size,
      features=transformed_feature_spec,
      reader=_gzip_reader_fn,
      label_key=transformed_name(LABEL_KEY)
  )

  return dataset
input_fn 함수를 사용하면 이전 변환 단계에서 생성한 전처리된 데이터셋을 로드할 수 있다. 이를 수행하려면 tf_transform_output을 피처에 전달해야 한다. 따라서 Transform 컴포넌트가 생성한 TFRecord 데이터 구조에서 데이터셋을 로드하는 데이터 스키마가 제공된다. 전처리된 데이터셋을 사용하면 학습 중에 데이터가 전처리되지 않도록 할 수 있어 학습 프로세스를 가속화할 수 있다.
input_fn은 한 번에 한 배치씩 모델에 데이터를 제공(batched_features_dataset)하는 제너레이터의 역할을 수행한다.
모델 컴파일 및 학습
데이터를 로드한 다음에는 모델 아키텍처를 정의하고 모델을 컴파일해야 한다. 이는 이전에 진행했으므로, run_fn() 내에서는 get_model()을 호출하기만 하면 된다.
model = get_model()
이제 케라스 fit() 메서드를 사용해서 컴파일된 tf.Keras 모델을 학습한다.
# train model
model.fit(
    train_dataset,
    steps_per_epoch=fn_args.train_steps,
    validation_data=eval_dataset,
    validation_steps=fn_args.eval_steps
)
steps vs epoch
TFX Trainer 컴포넌트는 학습 프로세스를 에포크가 아닌 스텝 수에 따라 정의한다. 스텝은 모델이 단일 배치의 데이터로 학습시키는 시점을 의미하며, 이를 이용하면 대용량 데이터셋으로 모델을 학습하거나 검증할 때 일부만을 사용하여 속도를 높이는 방법을 사용할 수 있다.
반대로, 만약 학습 데이터셋을 여러 번 반복하고자 할 경우 스텝 크기를 학습 가능한 샘플 수의 n배로 설정하면 된다.
모델 학습을 완료한 다음에는 학습된 모델을 내보내야 한다. 여기서는 전처리 단계를 모델과 함께 내보내는 방법을 알아보자.
모델 내보내기
파이프라인 컴포넌트의 전처리 단계를 학습된 모델과 함께 SavedModel 형식으로 저장한다. 저장하기에 앞서 모델 서명을 정의할 필요가 있는데, 이는 get_serve_tf_examples_fn() 함수에서 생성한 그래프를 기반으로 정의된다.
def get_serve_tf_examples_fn(model, tf_transform_output):
  # load preprocessing graph
  model.tft_layer = tf_transform_output.transform_features_layer()

  @tf.function
  def serve_tf_examples_fn(serialized_tf_examples):
    feature_spec = tf_transform_output.raw_features_spec()
    feature_spec.pop(LABEL_KEY)

    parsed_features = tf.io.parse_example(
        serialized_tf_examples, feature_spec
    )

    # apply transform to raw data
    transformed_features = model.tft_layer(parsed_features)

    # do prediction using transformed data
    outputs = model(transformed_feature)

    return {'outputs':outputs}

  return serve_tf_examples_fn
run_fn() 함수에서 모델 서명을 정의하고 모델을 저장한다.
# model signature
signatures = {
    'serving_default':
    _get_serve_tf_examples_fn(
        model,
        tf_transform_output).get_concrete_function(
            tf.TensorSpec(
                shape=[None],
                dtype=tf.string,
                name='examples'
            )
        )
}
model.save(fn_args.serving_model_dir,
            save_format='tf', signatures=signatures)
run_fn은 get_serve_tf_examples_fn을 모델 서명의 일부로 내보낸다. 모델을 내보내고 배포하면 모든 예측 요청이 serve_tf_examples_fn()을 통과한다. 요청 시마다 직렬화된 tf.Example 레코드를 구문 분석하고 전처리 단계를 원시 요청 데이터에 적용한다. 이후 모델이 전처리한 데이터를 예측하게 된다.
아래는 완성된 코드이다.
from typing import Text, List

import tensorflow as tf
import tensorflow_hub as hub
import tensorflow_transform as tft

# 'feature name': feauter dimension
ONE_HOT_FEATURES = {
    'product': 11,
    'sub_product': 45,
    'company_response': 5,
    'state': 60,
    'issue': 90,
}

# 'feature name': bucket count
BUCKET_FEATURES = {
    'zip_code': 10
}

# 'feature name': None
TEXT_FEATURES = {
    'consumer_complaint_narrative': None
}

LABEL_KEY = 'consumer_disputed'

def transformed_name(key):
  return key + '_xf'

def _gzip_reader_fn(filenames):
  return tf.data.TFRecordDataset(filenames, compression_type='GZIP')

def get_serve_tf_examples_fn(model, tf_transform_output):
  # load preprocessing graph
  model.tft_layer = tf_transform_output.transform_features_layer()

  @tf.function
  def serve_tf_examples_fn(serialized_tf_examples):
    feature_spec = tf_transform_output.raw_features_spec()
    feature_spec.pop(LABEL_KEY)

    parsed_features = tf.io.parse_example(
        serialized_tf_examples, feature_spec
    )

    # apply transform to raw data
    transformed_features = model.tft_layer(parsed_features)

    # do prediction using transformed data
    outputs = model(transformed_feature)

    return {'outputs':outputs}

  return serve_tf_examples_fn

def input_fn(file_pattern, tf_transform_output, batch_size=32):
  """Generates features and label for tuning/training.

  Args:
    file_pattern: input tfrecord file pattern
    tf_transform_output: A TFTransformOutput
    batch_size: representing the number of consecutive elements of returned
      dataset to combine in a single batch

  Returns:
    A dataset that contains (features, indices) tuple where features is a
      dictionary of Tensors, and indices is a single Tensor of label indices.
  """
  transformed_feature_spec = (
      tf_transform_output.transformed_feature_spec().copy()
  )

  dataset = tf.data.experimental.make_batched_features_dataset(
      file_pattern=file_pattern,
      batch_size=batch_size,
      features=transformed_feature_spec,
      reader=_gzip_reader_fn,
      label_key=transformed_name(LABEL_KEY)
  )

  return dataset

def get_model():

  # One-hot categorical features
  input_features = []

  # write input_feature for each features
  for key, dim in ONE_HOT_FEATURES.items():
    input_features.append(
        tf.keras.Input(shape=(dim+1,),
                       name=transformed_name(key))
    )

  # add bucket features
  for key, dim in BUCKET_FEATURES.items():
    input_features.append(
        tf.keras.Input(shape=(dim+1,),
                       name=transformed_name(key))
    )

  # add text features
  input_texts = []
  for key in TEXT_FEATURES.keys():
    input_texts.append(
        tf.keras.Input(shape=(1,),
                       name=transformed_name(key),
                       dtype=tf.string)
    )

  inputs = input_features + input_texts

  # Embedding Text features
  MODULE_URL = 'https://tfhub.dev/google/universal-sentence-encoder/4'

  # Load USE's tf.hub module
  embed = hub.KerasLayer(MODULE_URL)

  # Keras' input is 2 dim but encoder's is 1 dim
  reshaped_narrative = tf.reshape(input_texts[0], [-1])
  embed_narrative = embed(reshaped_narrative)
  deep_ff = tf.keras.layers.Reshape((512,), input_shape=(1, 512))(embed_narrative)

  deep = tf.keras.layers.Dense(256, activation='relu')(deep_ff)
  deep = tf.keras.layers.Dense(64, activation='relu')(deep)
  deep = tf.keras.layers.Dense(16, activation='relu')(deep)

  wide_ff = tf.keras.layers.concatenate(input_features)
  wide = tf.keras.layers.Dense(16, activation='relu')(wide_ff)

  both = tf.keras.layers.concatenate([deep, wide])

  output = tf.keras.layers.Dense(1, activation='sigmoid')(both)

  # make keras model graph
  keras_model = tf.keras.models.Model(inputs, output)

  keras_model.compile(optimizer=tf.keras.optimizers.Adam(learning_rate=0.001),
                      loss='binary_crossentropy',
                      metrics = [
                                 tf.keras.metrics.BinaryAccuracy(),
                                 tf.keras.metrics.TruePositives()
                      ])

  return keras_model

def run_fn(fn_args):
  tf_transform_output = tft.TFTransformOutput(fn_args.transform_output)
  train_dataset = input_fn(fn_args.train_files, tf_transform_output)
  eval_dataset = input_fn(fn_args.eval_files, tf_transform_output)

  # load model
  model = get_model()

  # train model
  model.fit(
      train_dataset,
      steps_per_epoch=fn_args.train_steps,
      validation_data=eval_dataset,
      validation_steps=fn_args.eval_steps
  )

  # model signature
  signatures = {
      'serving_default':
      _get_serve_tf_examples_fn(
          model,
          tf_transform_output).get_concrete_function(
              tf.TensorSpec(
                  shape=[None],
                  dtype=tf.string,
                  name='examples'
              )
          )
  }
  model.save(fn_args.serving_model_dir,
              save_format='tf', signatures=signatures)
Trainer 컴포넌트 실행
Trainer 컴포넌트는 다음을 입력으로 받아 사용할 수 있다.
- 파이썬 모듈 파일
run_fn(), input_fn(), get_serve_tf_examples_fn() 등의 함수를 포함하고 있는 module.py 파일 - Transform 컴포넌트에서 생성된 결과물
변환 예제, 변환 그래프 - ExampleValidator 컴포넌트 생성 스키마
- 학습 및 평가 단계 수
from tfx.components import Trainer
trainer = Trainer(
    module_file = os.path.abspath('module.py'),
    examples = transform.outputs['transformed_examples'],
    transform_graph = transform.outputs['trnasform_graph'],
    schema = schema_gen.outputs['schema'],
    train_args = tfx.proto.TrainArgs(num_steps=100),
    eval_args = tfx.proto.EvalArgs(num_steps=50)
)

context.run(trainer)
모델 학습과 내보내기가 완료되면 컴포넌트는 내보낸 모델의 경로를 메타데이터스토어에 등록한다.
Trainer 컴포넌트의 Executor 오버라이딩
예제 프로젝트에서는 다양한 형태의 모델에 범용적으로 학습 진입점을 제공하기 위해 run_fn() 함수를 사용하도록 Trainer 컴포넌트의 실행자를 재정의했다. trainer_fn()의 경우 tf.Estimator 모델만을 지원한다.
파이프라인 외부에서 SavedModel 사용하기
TFX 파이프라인 외부에서 내보낸 SavedModel을 검사하려면 모델을 콘크리트 함수로 로드하면 된다. 이 함수는 단일 서명 그래프를 나타낸다.
import tensorflow as tf
model_path = trainer.outputs['model'].get()[0].uri + "/Format-Serving"
model = tf.saved_model.load(export_dir=model_path)
predict_fn = model.signatures['serving_default']
모델을 콘크리트 함수로 로드한 후에는 예측을 수행할 수 있다. 내보낸 모델은 tf.Example 데이터 구조에 입력 데이터가 제공되기를 기대한다. 다음 코드는 직렬화된 데이터 구조를 생성하고 prediction_fn() 함수를 호출하여 모델 예측을 수행하는 방법이다.
example = tf.train.Example(features=tf.train.Features(feature={
    'feature_A': _bytes_feature(feature_A_value),
    ...
}))

serialized_example = example.SerializeToString()
print(predict_fn(tf.constant([serialized_example])))
다음은 완성된 예제이다.
from tfx import v1 as tfx
from tfx.components import StatisticsGen, SchemaGen, Transform, Trainer, CsvExampleGen
from tfx.proto import example_gen_pb2
from tfx.orchestration.experimental.interactive.interactive_context import InteractiveContext

import os

context = InteractiveContext()

dir_path = os.path.abspath(os.getcwd())
data_dir = os.path.join(dir_path, '..', '..', 'data', 'processed')
output = example_gen_pb2.Output(
    # define preferred split
    split_config = example_gen_pb2.SplitConfig(splits=[
        # define ratio
        example_gen_pb2.SplitConfig.Split(name='train', hash_buckets=6),
        example_gen_pb2.SplitConfig.Split(name='eval', hash_buckets=2),
        example_gen_pb2.SplitConfig.Split(name='test', hash_buckets=2),
    ])
)

example_gen = CsvExampleGen(input_base=data_dir, output_config=output)
context.run(example_gen)

# check artifacts from example_gen
for artifact in example_gen.outputs['examples'].get():
  print(artifact)

statistics_gen = StatisticsGen(examples=example_gen.outputs['examples'])
context.run(statistics_gen)

context.show(statistics_gen.outputs['statistics'])

statistics_gen = StatisticsGen(examples=example_gen.outputs['examples'])
context.run(statistics_gen)

for artifact in statistics_gen.outputs['statistics'].get():
  print(artifact.uri)

schema_gen = SchemaGen(
    statistics = statistics_gen.outputs['statistics'],
    infer_feature_shape = False
)
context.run(schema_gen)

transform = Transform(
    examples=example_gen.outputs['examples'],
    schema=schema_gen.outputs['schema'],
    module_file=os.path.abspath('transform.py'),
)
context.run(schema_gen)

trainer = Trainer(
    module_file = os.path.abspath('module.py'),
    examples = transform.outputs['transformed_examples'],
    transform_graph = transform.outputs['trnasform_graph'],
    schema = schema_gen.outputs['schema'],
    train_args = tfx.proto.TrainArgs(num_steps=100),
    eval_args = tfx.proto.EvalArgs(num_steps=50)
)
context.run(trainer)

import tensorflow as tf
model_path = trainer.outputs['model'].get()[0].uri + "/Format-Serving"
model = tf.saved_model.load(export_dir=model_path)
predict_fn = model.signatures['serving_default']
대화형 파이프라인에서 텐서보드 사용하기
학습 중에 모델 진행 상황을 자세히 검사하려면 텐서보드를 사용하면 된다. 텐서보드(TensorBoard)는 텐서플로우 생태계의 일부로, 학습 중에 지표를 모니터링하거나 모델에서 계층의 활성화를 확인하는 등, 파이프라인에서 사용할 수 있는 여러 유용한 기능을 보유하고 있는 훌륭한 툴이다.
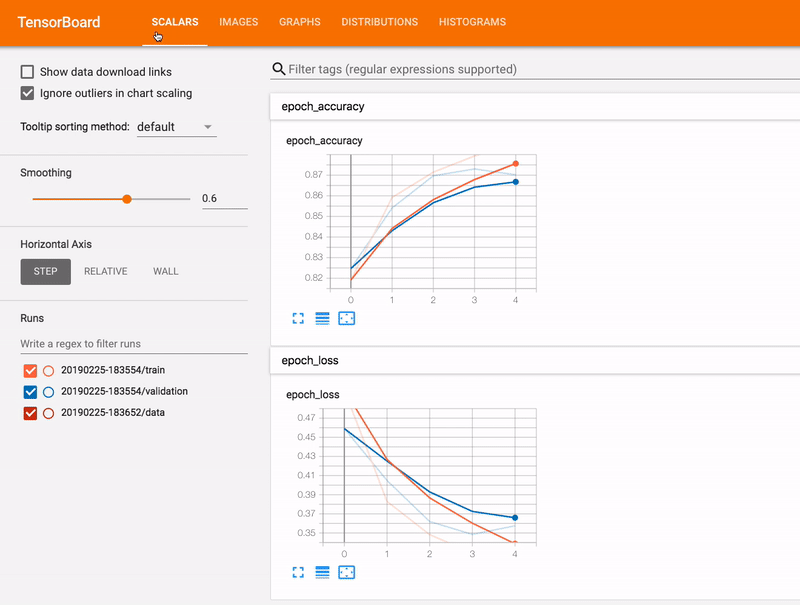
파이프라인에서 텐서보드를 사용하려면 run_fn() 함수와 모델에 텐서보드 콜백을 추가하고, 지정 폴더에 학습 로그가 기록되도록 해야 한다.
# add callback to run_fn
log_dir = os.path.join(os.path.dirname(fn_args.serving_model_dir), 'logs')
tensorboard_callback = tf.keras.callbacks.TensorBoard(log_dir=log_dir, update_freq='batch')
# add callback to model fit
model.fit(
train_dataset,
steps_per_epoch=fn_args.train_steps,
validation_data=eval_dataset,
validation_steps=fn_args.eval_steps,
callbacks=[tensorboard_callback]
)이후 모델 학습 로그파일의 위치를 텐서보드에 전달하면 텐서보드에 의한 시각화를 확인할 수 있다.
model_dir = trainer.outputs['output'].get()[0].uri

%load_ext tensorboard
%tensorboard --logdir {model_dir}
노트북 외부에서 텐서보드를 사용하기 위해서는 다음을 실행한 후 https://localhost:6006/에 연결하여 텐서보드를 확인할 수도 있다.
tensorboard --logdir PATH/TO/LOGS
'MLOps' 카테고리의 다른 글
| 모델 분석 방법 (0) | 2022.01.26 |
|---|---|
| 모델 튜닝 (0) | 2022.01.19 |
| TFX 모델 학습 - 모델 정의하기 (0) | 2022.01.10 |
| TFT를 머신러닝 파이프라인에 통합하기 (0) | 2022.01.08 |
| TFT 독립 실행형으로 실행하기 (0) | 2022.01.06 |

댓글